Butterfly Gardening for Sustainable Sewists
- Radha

- Apr 10, 2024
- 3 min read
Have you ever wondered how you could attract more butterflies to your yard? (And then beautifully draw them on fabric to add to any sewing project!?). Laurel Parkel from Sew Nature is our guest today on the blog and with a master's in environmental science, and 30 years' experience restoring ecosystems she is here to share how easy it can be to combine art and science to help the planet.
Part 1: The Butterflies
It Starts with Native Plants
First, the best type of plants are native plants to your area. Insects like butterflies co-evolve with the local plants so not only will you see more butterflies you’ll have easier plants to take care of that are used to your local climate. And you won’t need insecticides which are very harmful to butterflies.
The best place to get native plants is a local native nursery, a good resource for this is Garden for Wildlife by NWF: Shop Plants to Save Wildlife. Or google "Native plant nursery near me".
Butterflies can detect their host plant a mile away.
Nectar & Host

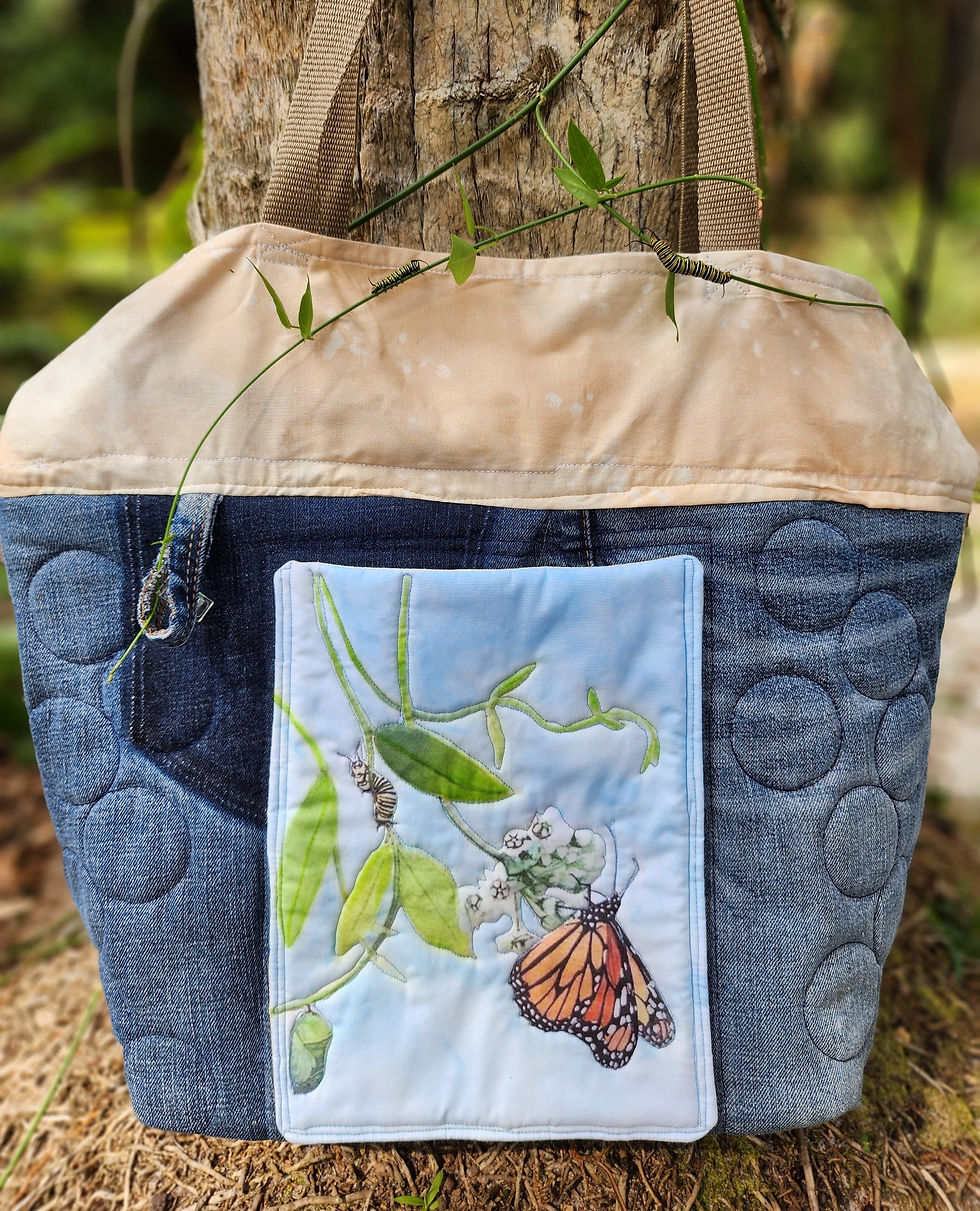
Once you find a source for native plants shop for two types: nectar and host. The nectar plants provide food for the adult butterflies and the host plants allow the butterflies to reproduce. Butterflies and the host plants co-evolved and are specific to each other. For example, Monarchs will only lay their eggs on milkweeds like this Twinevine in figure 1. There are about 140 species of milkweeds, so find ones that are local to your area.
Plant a variety of Host and Nectar plants - butterflies can detect their host plant a mile away. So, you plant them, and they will come!
Figure 2 below shows the orange-yellow Blanket Flower, which is a great Nectar source for butterflies. The image on the pocket is based on art by Maria Merian; the pocket depicts the Blue Morpho Butterfly who lives in Central and South America and prefers laying its eggs on plants in the pea family, not the West Indian Cherry as Merian's picture would imply!

Butterfly gardening is good for the environment. Our butterflies and other pollinators are in trouble, and you can help by providing the necessary plants they need to survive and thrive. And you’ll enjoy the flowering plants and butterflies flitting around your yard!
For a free video on Butterfly gardening go to butterfly video (sewnature.com)
Part 2: the Bag
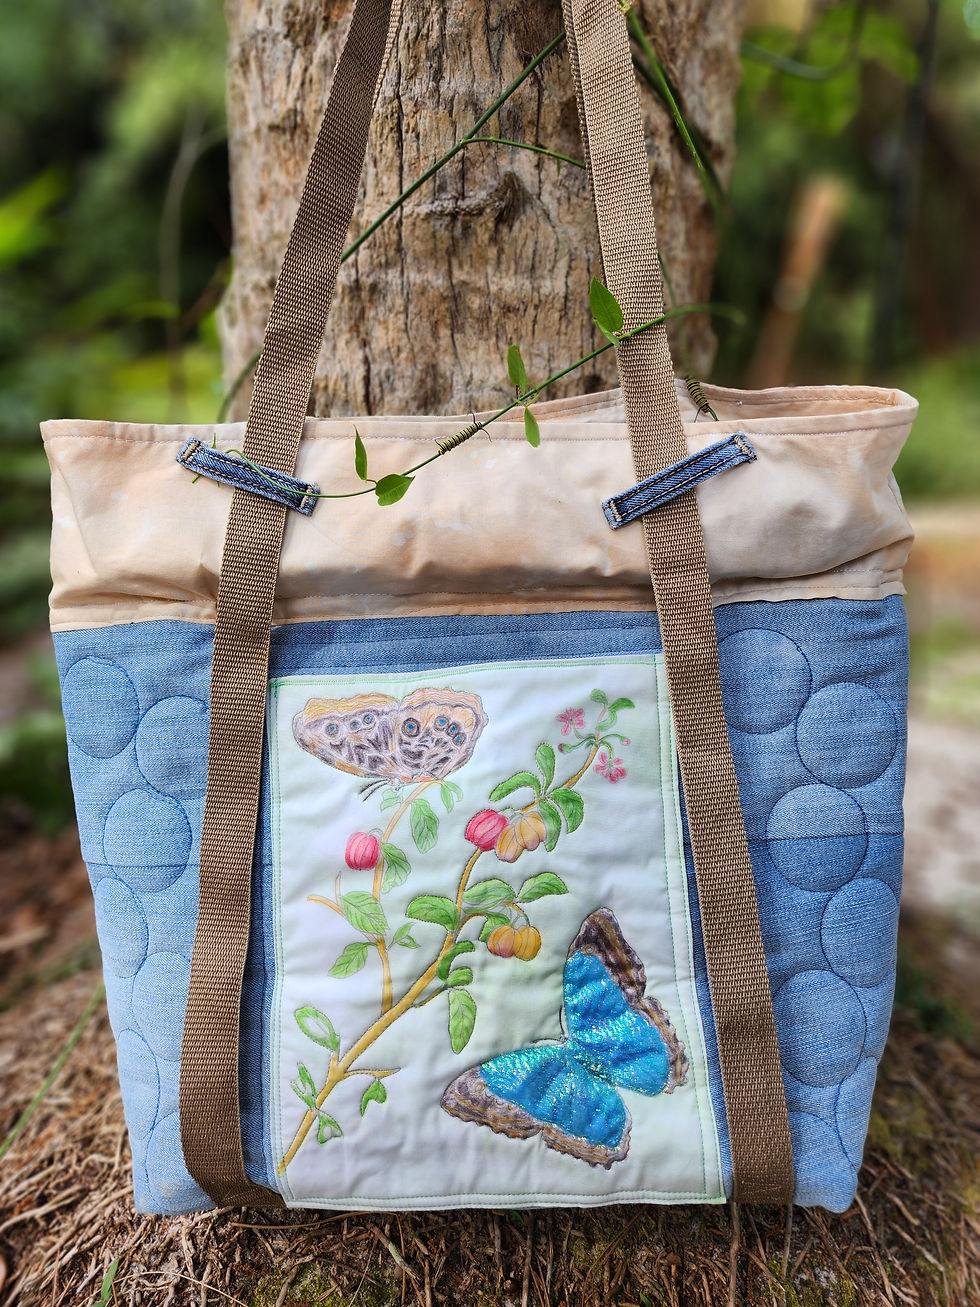
I made the Totepack from Sewing through Fog and used my Inktense pencil sheets to make the pockets. I love this bag, it's beautiful, I can carry it as a backpack and it has pockets to keep everything organized! It makes me happy just toting it around and I get lots of compliments on it.
You may be wondering what is Inktense? Inktense, a combination of “ink” and “intense” and is basically ink in the form of pencils. They are permanent, making them a wonderful pencil for painting on fabric. And they are easy since you just pencil them on and then activate. To learn more get Sew Nature’s free Inktense tip sheet: Tip Sheet (sewnature.org)
Materials:
To make the lined pockets pictured here, you will need the patterns from SewNature (50% of profits go to ecological restoration projects). Use this coupon and get 20% off 2 patterns: 20%off2patterns
1 piece of batting about 8.5”x 11.5”. I like to have the batting behind my fabric while I’m painting.
1 piece of fabric for the lining of the pocket about 8.5” x 11”
Directions:
Sandwich the 3 pieces with the lining right side down, Inktense sheet right side up and the batting on the bottom (first image below).
Sew the sandwich together with a 3/8” seam and leave a 3” opening.
Snip the corners (second image).
Turn the pocket right side out.
Iron in the 3” opening.
Optional: Free motion quilt the pocket together. I like to trace the motifs with my stitching.
Center and pin the pocket to your Bag Body (third image).
Top stitch around the 2 sides and bottom (fourth and fifth images). If you are making the Totepack pattern, this is after page 10.
Finish your Totepack per pattern making sure the straps go on either side of the pocket.


Congratulations, you’ve made a beautiful, unique, creative bag you’ll enjoy ‘toting’ around.


Comments